研究目的
Investigating the effect of welding heat input on porosity defects in fiber laser welded joints of powder metallurgy molybdenum alloy.
研究成果
Laser welding of an NS-Mo alloy under a low heat input resulted in less spatters, and a smooth weld surface. In contrast, a large amount of spatter was observed for samples prepared with a high heat input. When the welding heat input decreased from 3600 J/cm to 250 J/cm, the porosity ratio of the NS-Mo joints declined from 10.7% to 2.1%. Notable irregularly-shaped porosities formed under a high welding heat input were mainly related to the instability of the keyhole, while the spherical defects formed at a low welding heat input were due to the fact that bubbles released from the powder metallurgy BM did not have enough time to escape.
研究不足
The study is limited to the effects of welding heat input on porosity defects in fiber laser welded joints of powder metallurgy molybdenum alloy. The research does not explore other welding parameters or materials.
1:Experimental Design and Method Selection:
Fiber laser welding of end plug and cladding tube made of nanostructured high-strength molybdenum (NS-Mo) alloy was performed with an emphasis on the role of welding heat input. The distribution and morphology of porosity defects in the welded joints were examined by computed tomography (CT) and scanning electron microscopy (SEM).
2:Sample Selection and Data Sources:
The experimental material NS-Mo consists of a Mo metal substrate with 0.5 wt% nano-sized La2O3 particles dispersed in the substrate. The geometries of the NS-Mo cladding tube and end plug were used.
3:5 wt% nano-sized La2O3 particles dispersed in the substrate. The geometries of the NS-Mo cladding tube and end plug were used.
List of Experimental Equipment and Materials:
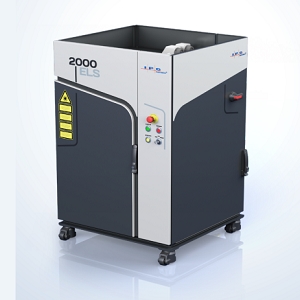
3. List of Experimental Equipment and Materials: IPG YLS-4000 fiber laser, Y.CT Modular-YXLON industrial computed tomography (CT) system, Nikon Eclipse MA200 optical microscope, FESEM-SU6600 scanning electron microscope (SEM).
4:Experimental Procedures and Operational Workflow:
Before welding, the cladding tube and end plug made of NS-Mo were polished, washed in acetone, and then assembled. Laser beam irradiation of the lap zone of the cladding tube and end plug during welding tests was undertaken. The welding tests were carried out using an IPG YLS-4000 fiber laser. After welding, the porosity defects in the welded seams were detected using a Y.CT Modular-YXLON industrial computed tomography (CT) system.
5:Data Analysis Methods:
The CT results were analyzed using the Mimics Medical software. The cross-sectional morphologies of the welded joints were observed using a Nikon Eclipse MA200 optical microscope. The porosity morphologies were observed by using an FESEM-SU6600 scanning electron microscope (SEM).
独家科研数据包�����,助您复现前沿成果����,加速创新突破
获取完整内容


